MS CRM 2011 SharePoint List Component Installation and Site Configuration
This describes the steps to install the SharePoint List Component for MS CRM 2011, as well as configure a SharePoint Web Application if you do not already have one. Most of the content was originally posted by Mark Kovalcson on his blog at MS CRM 2011 SharePoint List Component Installation, but additional notes have been added throughout the steps. Pay special attention to items in red.
Installing the SharePoint List Component
Note that to perform the following functions you will need to be part of the Site Collection Administrators Group. If you plan on setting up a new SharePoint Web Application you will need to be part of the Farm Administrators Group.
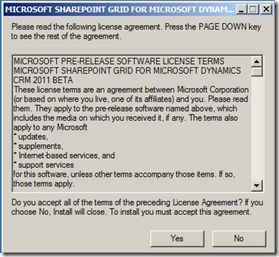
Warning if you downloaded the file just as this was introduced it contains an unsigned assembly that will give you an error message shown when you would see it during the installation below. A fix was put out by MS a few days later. If in doubt download it again.
Download the SharePoint List Component
CRM2011-SharePointList-ENU-amd64.exe file and run it on your VM.
Pick a place to unpack the contents. You will be browsing to the crmlistcomponent.wsp file from SharePoint later.
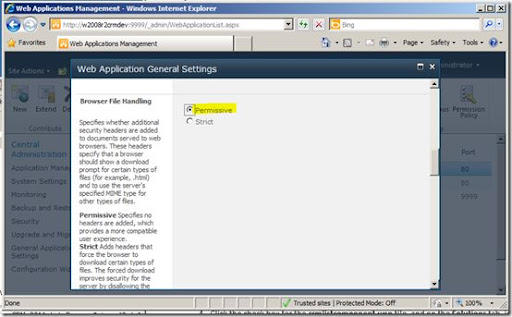
Before installing the List component you need to relax the Browser File Handling to “Permissive” for the Web application that you are sharing with MS CRM 2011.
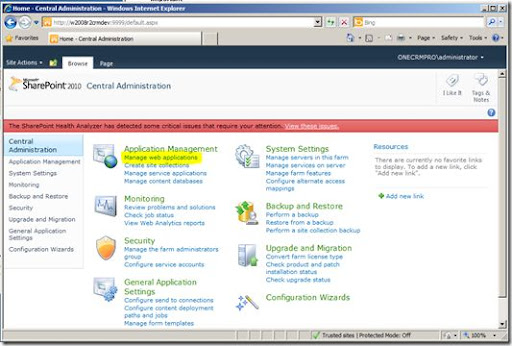
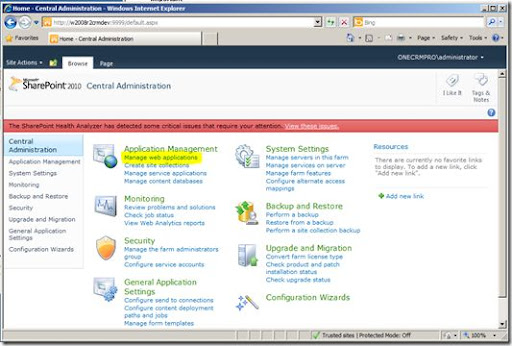
Go to SharePoint Central Administration and click on Manage web applications.
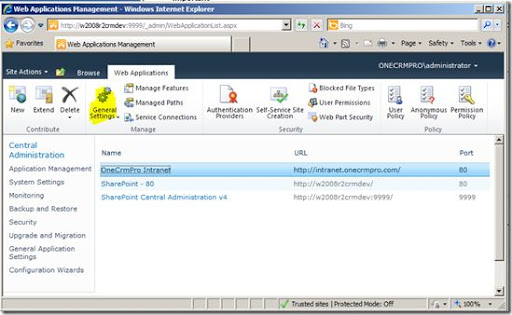
Select the web application that you are sharing with MS CRM and click on General Settings.
For additional information on setting up a new SharePoint application see instructions at the end.
Scroll down to Browser File Handling and click on permissive then scroll to the bottom and click OK.
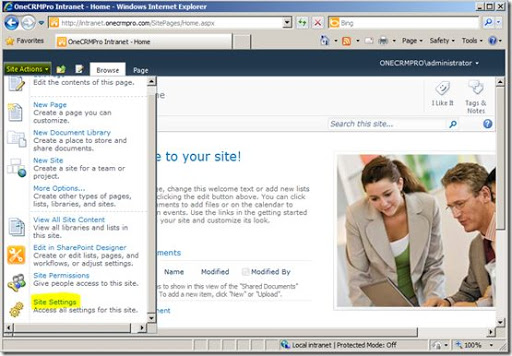
Now visit your SharePoint Site and click on Site Actions then Site Settings.
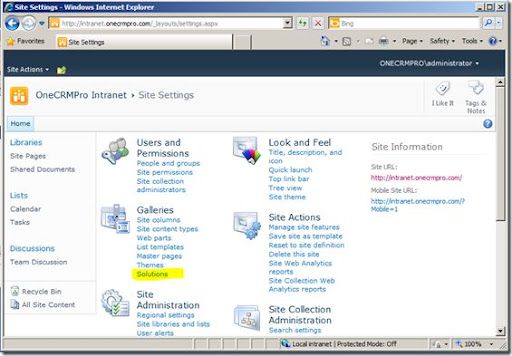
Click on Solutions under Galleries
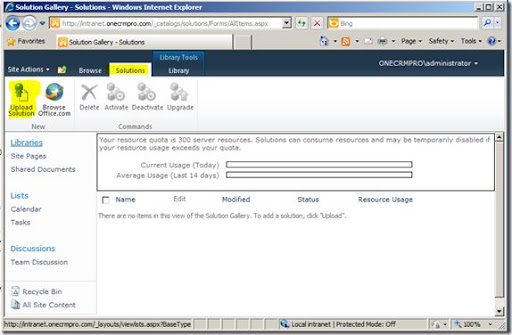
Click the Solutions Tab, and a ribbon will appear. Click on Upload Solution in that Ribbon.
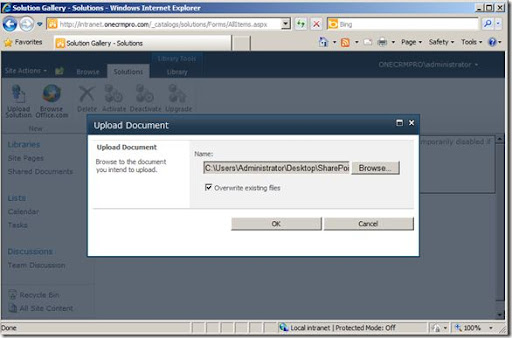
Now browse to the crmlistcomponent.wsp file that was unpacked earlier and click OK.
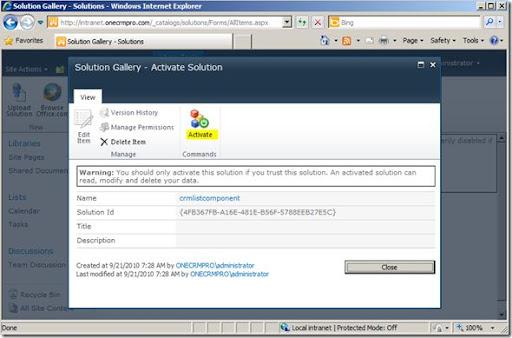
Now you need to Activate this solution.
Note: that if the Activate Button is not available you may need to run the following command in Windows PowerShell to provision the SPUserCodeV4 service.
C:\> cd “C:\Program Files\Common Files\Microsoft Shared\Web Server Extensions\14\BIN”
C:\Program Files\Common Files\Microsoft Shared\Web Server Extensions\14\BIN> .\ stsadm -o provisionservice -action start -servicetype Microsoft.SharePoint.Administration.SPUserCodeService -servicename SPUserCodeV4
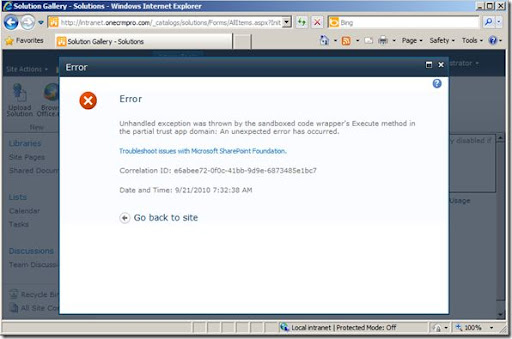
Note: The error below will only happen if you are still using the Initial download of the CRM2011-SharePointList-ENU-amd64.exe file.
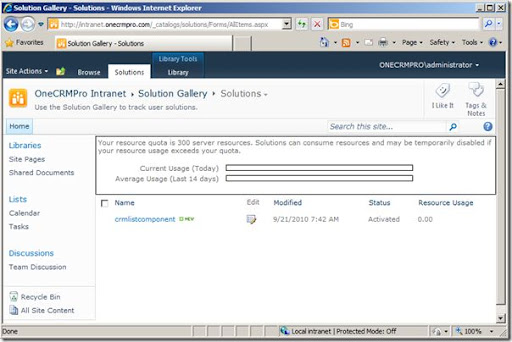
You should see this if you have the right version.
The SharePoint List Component is now in place.
To test this in CRM.
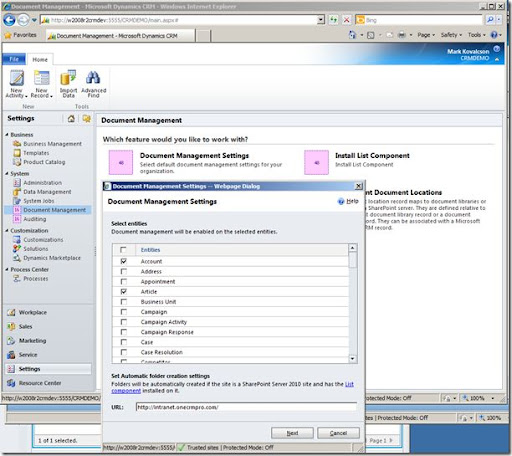
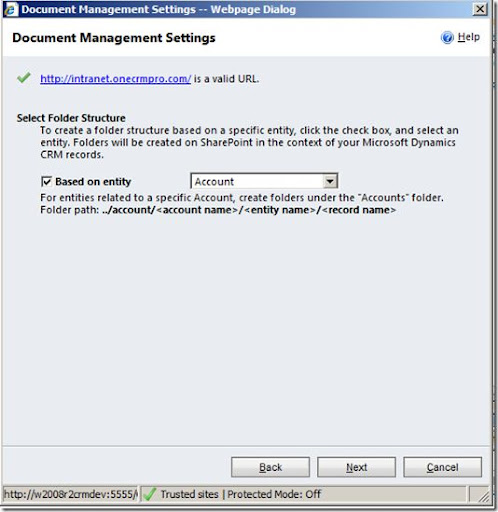
Go to Settings, Document Management and click on Document Management Settings. Enter your shared SharePoint site. Click Next
You can pick Account, Contact or not select where you Document Library will be based. I selected Account below. Click Next
When it is all done, click finish.
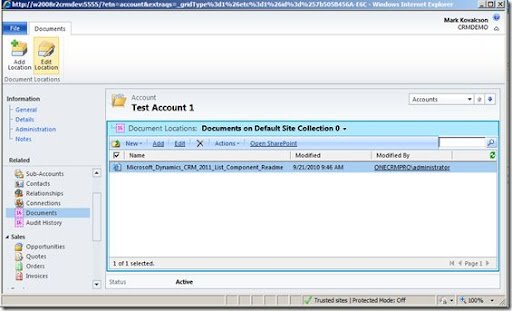
Create a Test Account if you don’t already have one. Add a document of some kind. It will prompt you for a location to automatically create a SharePoint Folder the first time you do this per Account. Click OK.
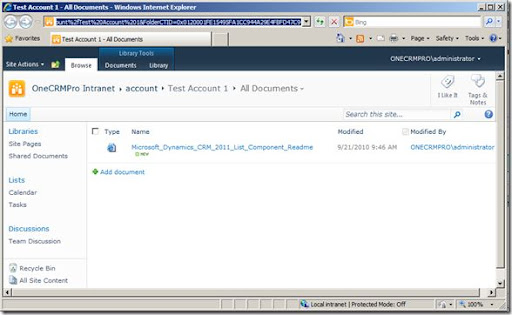
Click the Open SharePoint link to see the document in SharePoint. Both sides can now work with documents in this folder.
Setting up a SharePoint web application
Note: that to perform the following functions you will need to be part of the SharePoint Farm Administrators Group.
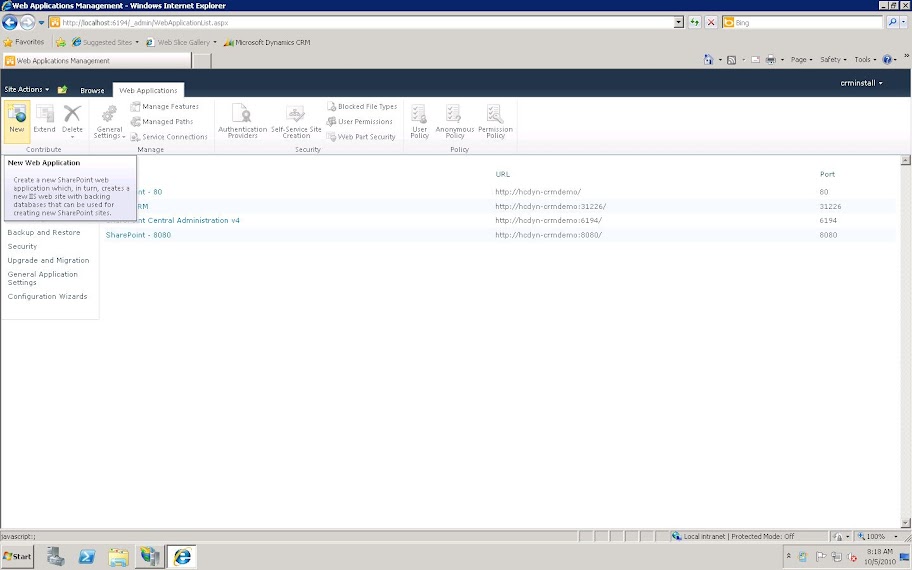
From the SharePoint Central Administration Screen, click Manage Web Applications.
In the top-left, click New.
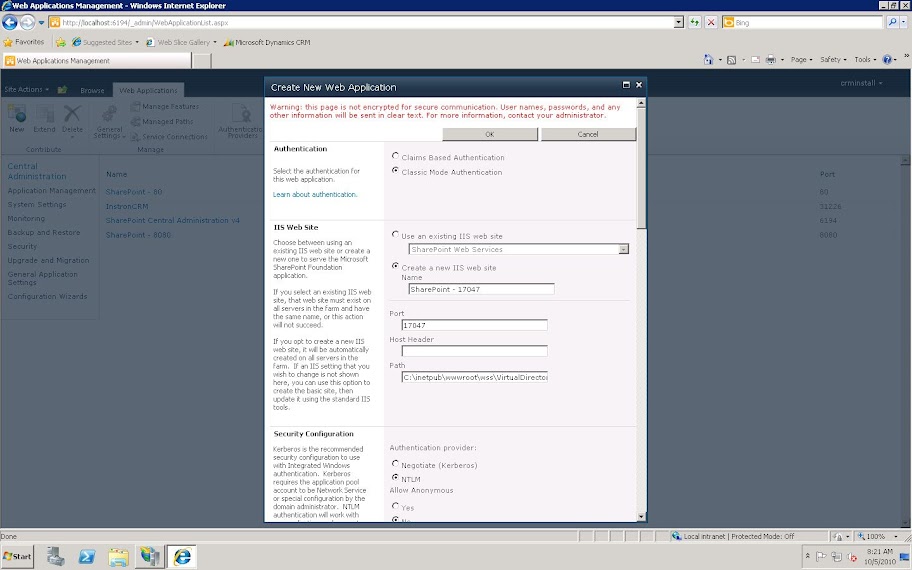
Setup your new web application with the default properties, giving it a valid name, and click OK.
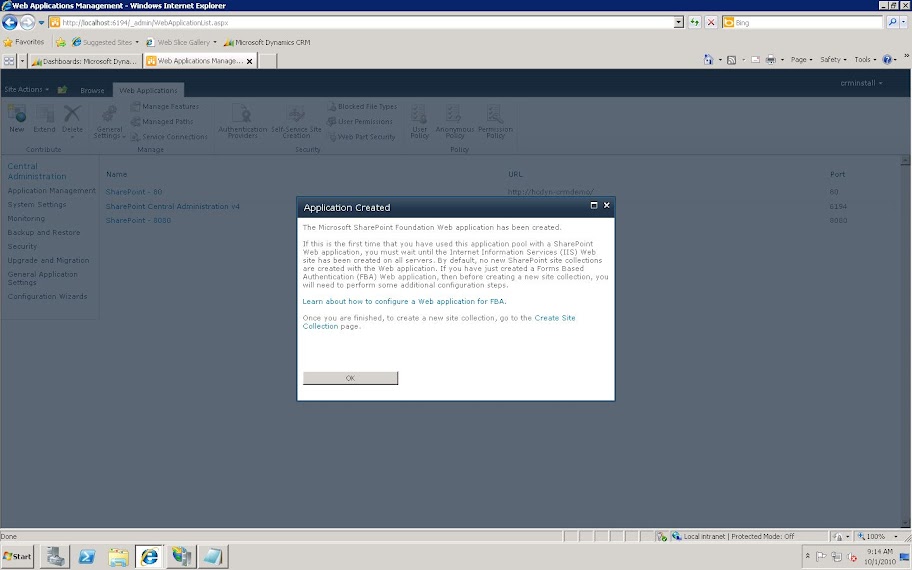
When you create you SharePoint Application, you will be given the following confirmation. In order to access the web site however, you must create a Site Collection. Otherwise, when you browse to your website URL, you will be given a 404 File Not Found Error.
The easiest way to do this click on the link provided in the Application Created dialogue box.
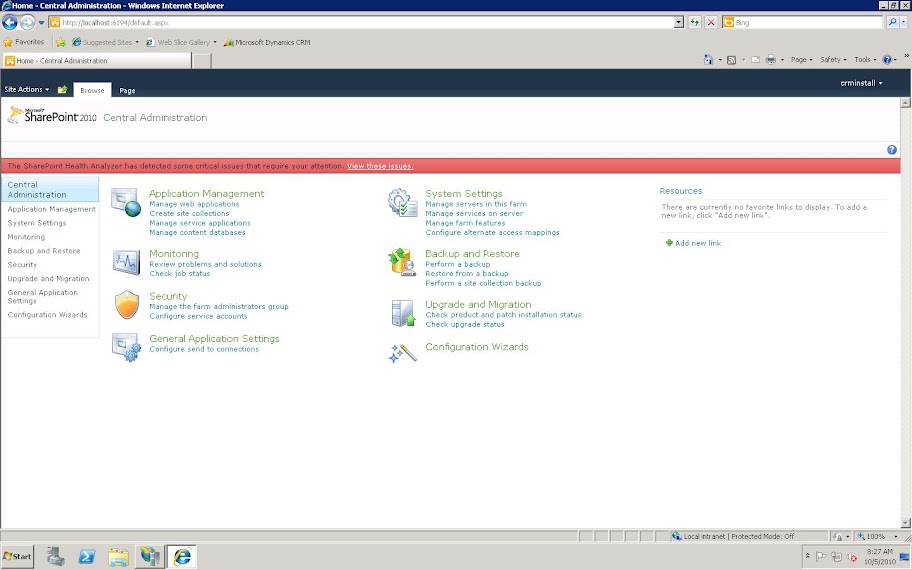
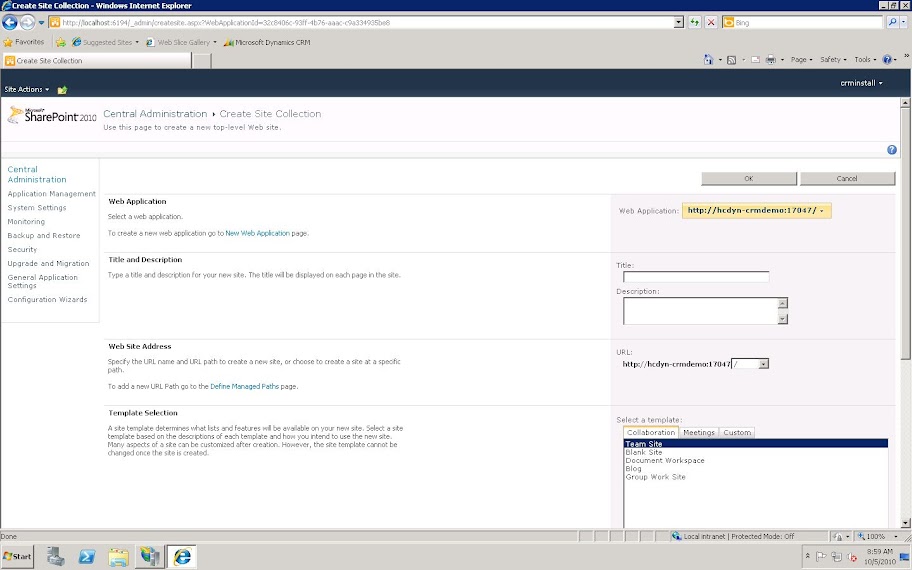
Alternatively, if you forget to click this link, you can navigate the to the Central Administration Home page, and choose Create Site Collection from the Application Management Section.
Create a Top Page Site Collection to allow your Web Application a home page to land on and click ok.
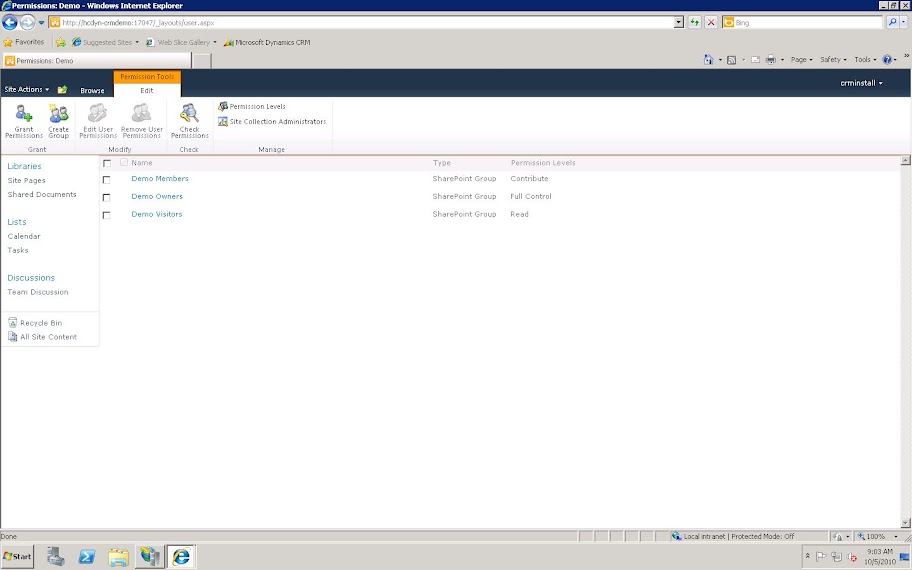
Finally, make sure to add any users that will be accessing the document management features from CRM to the appropriate User Groups in your SharePoint site.
Once the SharePoint installation is complete, you can install the List Components.
