How to Create a Microsoft Dynamics CRM 4 Report Subscription in less than 15 minutes
UPDATE FOR 2011: 2011 Report Subscriptions
Scheduling report subscriptions is fairly easy if you know the right steps to take. Following the steps below should get you up and running with report subscriptions fairly quickly and you can begin Wowing your users with the delivery of reports directly to their Outlook Inbox.
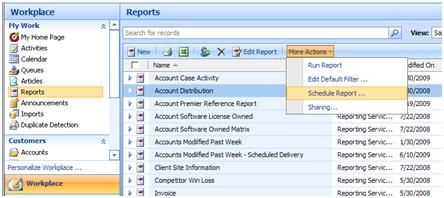
The first step you need to take is to open your CRM application and navigate to Workplace, Reports. Identify and Select the report that you want to schedule, select More Actions from the top menu bar and select Schedule Report from the dropdown.
I will select the Account Distribution report for scheduling:
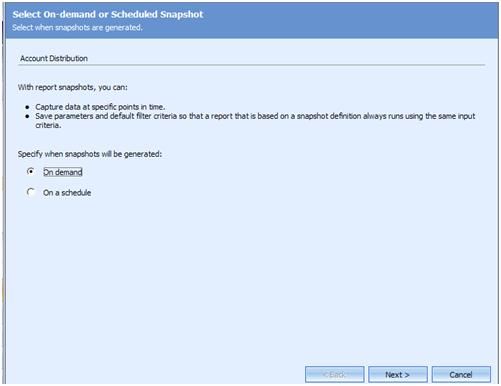
A wizard dialogue window will open. Select On Demand and Next. We don’t need to select On Schedule because we don’t necessarily want to run Report Snapshots; we want to setup a Subscription for delivery. If you decide you want to create Snapshots in addition to a Subscription, you can do that later from the Report Server:
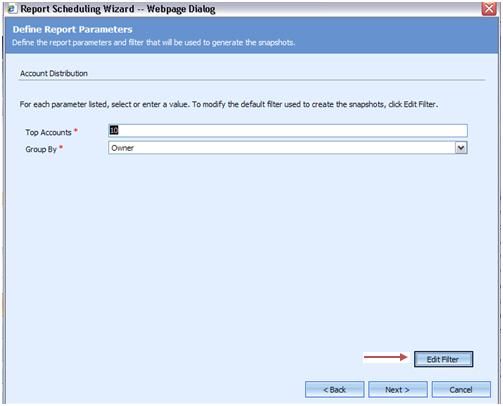
If you want to change the Default Parameters used for the Subscription, select Edit Filter, select the filtering criteria, and Save or leave the defaults provided and Select Next
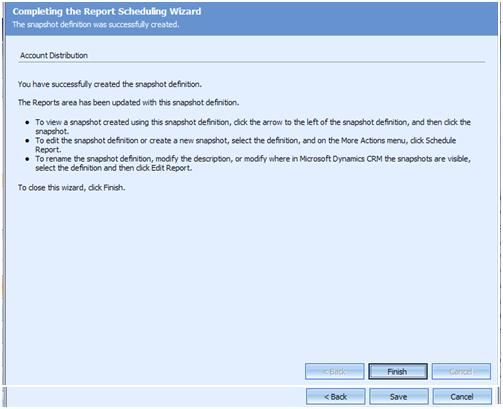
Select “No just save the Snapshot Definition and select Save. The report Snapshot Definition was successfully credited. Select Finish:
Now if you look at your Report grid in CRM you will see a new report listed with the same name referenced on the Save wizard dialogue window. In this case the report name was: Account Distribution – On-demand Snapshots 7_17_2009 9_15 AM:
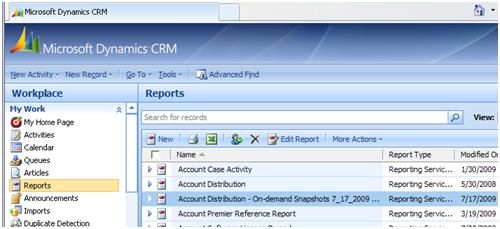
If you select the report and select the Edit Report button, a new window will open showing you the details of the report. Select Administration and you will see that the report is set to Individual View only as users in the Organization do not need to view this report directly from the Dynamics Application. Leave the Settings and close the window.

Now we will move on to the CRM Report Server
You can access your Reporting Services Home page by using the URL http://NameofReportServer/reports. The Reporting Services Home page URL is different than the Report Server which is located at http://NameofReportServer/reportserver so ensure you are using the correct URL.
You will see a list of all your Report folders after the page opens. In this example you do not see the full name of the Report folder but you will see the full name in your deployment. In the upper right-hand corner of the Reporting Services Home page, select Show Details
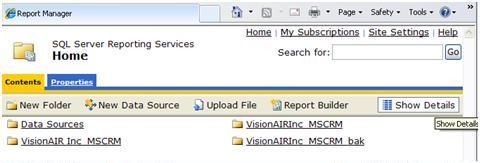
You will notice that the page layout changes slightly and you can now see a new link name Edit

Select the Report folder that contains the reports for your CRM 4.0 deployment and select the 4.0 folder
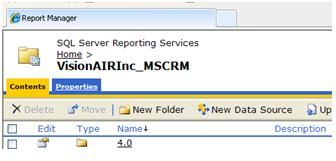
After you select the 4.0 folder, you will see a list of your CRM reports. Locate the report that you created in the CRM application. You can easily find it as the report name, which in this example was “Account Distribution – On-demand Snapshots 7_17_2009 9_15 AM”, is included in the Description field.

Select the Edit Icon link located to the left of the report

Select the Subscriptions tab
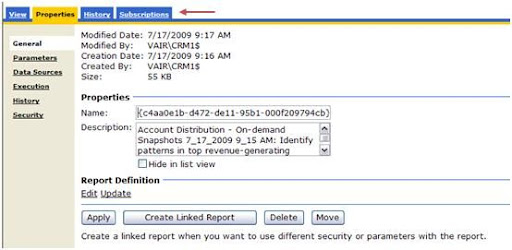
Select the New Subscription button
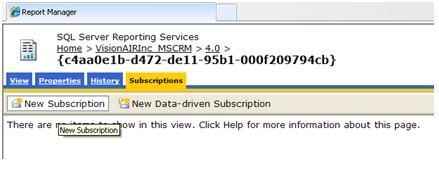
This will open the window that allows you to enter the details for the report subscription
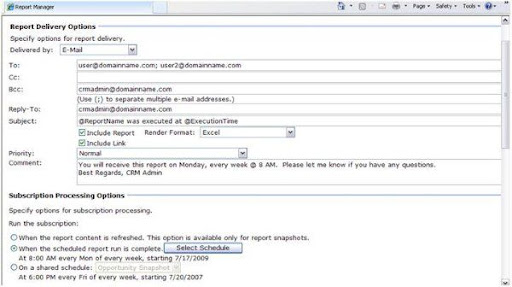
You can now enter the information that will determine how the report is delivered, who receives it and the report delivery frequency.
• Leave the default delivery method of E-mail selected
• Enter the e-mail address for the recipients
• I generally include my e-mail address in the BCC field to ensure the report runs as expected at least the first few times and the format is what I intended
• Enter the Reply-To e-mail address
• Modify the Subject line for whatever you prefer
• This will be the subject line of the e-mail
• At a minimum Replace “ @ReportName” with the actual Report Name otherwise the value will be the GUID of the report which is not a user friendly name
• Leave the Include Report and select the Render Format option you prefer. I generally use Excel as this gives users the option to manipulate the report data in a format familiar to them.
• Leave the Include Link only if it is ok with you that users open the Report directly from the Report Server rather than through the CRM application
• Set Priority
• Add Comments
• Select the Schedule you want the Report to run by selecting the Select Schedule button
• Select the OK button and the Subscription is created and saved
Saving the Subscription will create a SQL job that runs on the date and time you indicated to deliver the report to your recipients. If you have not yet setup your Report Server for E-Mail Delivery then review this MSDN article for the steps needed to implement that service.
Once you create a few subscriptions, you will be able to take a few shortcuts that will reduce the steps needed to create new subscriptions. After generating one or two of these subscriptions, you will be an expert.
NOTE: You may see following error while creating report subscription :
“Failure sending mail: The selected report is not ready for viewing. The report is still being rendered or a report snapshot is not available.Mail will not be resent”
This error occurs because of the way report excution set in the report server.
If you change the Excution property to “Always run this report with the most recent data” , it will resolve the issue
Source From: Donna Edwards
Share on Facebook


